High Resolution Jewelry 3D Scanner
Professional Manufacturer in China
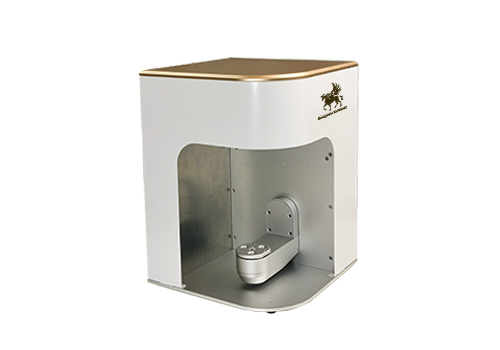
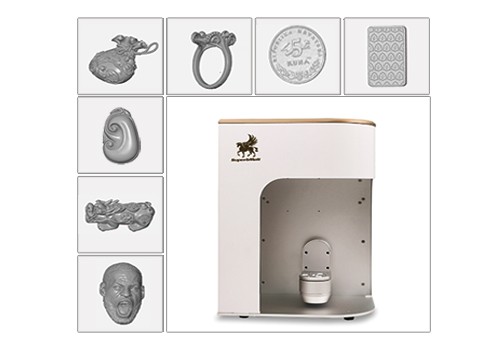
Superbmelt Jewelry 3D scanner is the perfect solution for anyone looking to capture high-precision data with ease. Our scanner records and stores beautiful 3D jewelry data, saving time in jewelry design, modification and production. By digitizing the jewelry industry with our cutting-edge technology, we can help promote innovation and upgrade the quality of jewelry products.
We use the latest technology to digitize the physical product, so as to help jewelers realize the digital storage of jewelry, help enterprises quickly respond to customer customization needs, and reduce design time costs.
| Model NO. | SPB-5DS |
| Powersource | AC100-220V,50Hz |
| Camera | 2*6.3MP |
| Light source | Blue LED |
| File format | STL,OBJ |
| Interface | 2*USB3.0 |
| Scanspeed | ≤3s |
| Scan accuracy | ≤0.01mm |
| Single capturerange | 100X80X80mm |
| Supported OS | Win 7/10 |
| Dimensions | 330 X 317 X456mm |
| Net Weight | 15kg |
Good Compatibility
One click to generate standard STL 3D format, compatible with various CAD design software and 3D printers. This makes the design and reproduction of jewelry easier and more convenient, and is suitable for a wide range of other uses.
Integrated Design
Small hardware system, easy to disassemble and install, suitable for carrying.
The compact and portable 3D scanner machine has a simple structure, which solves the possibility of going out to work. It can be used on the desktop and is very suitable for private customized jewelry studios.
High Quality Data
The machine uses industrial-grade blue light, which can achieve strong anti-interference, ensure the accuracy of scanning results, and has excellent noise reduction ability, ensuring the output of high-quality data.
Simple to Use
The machine only needs to be set to the design file, and it can achieve fully automatic scanning, customers can easily and quickly obtain data, saving time and labor costs.
Humanized Design
The machine outline of the 3d scanner is open, and the machine design is simple and concise, which is convenient for mold cleaning and placement.
High Precision
The 3D scanner adopts a 16mm 5MP standard optical measurement lens module, which has high precision and achieves intelligent fusion, and the single scanning accuracy can reach 0.01mm.
Use Structured Blue Light
With contrast enhancers, this light is more professional when scanning complex geometry and exporting fantastic details.The service life of the light source is more than 30000h.
Scan Multiple Items at Once
This 3d scanner can scan <= 12 items at a time, and can be exported separately using STL files, which greatly improves work efficiency.
In this way, the mass production of jewelry can be realized, and the obtained three-dimensional data can be easily enlarged or reduced and then engraved by the engraving machine.
Low Heat Generation and High Stability
The shell of the machine is made of sheet metal, which is hard and strong. It can work for a long time, realize large-scale storage, and improve the efficiency of data storage for large jewelry stores and factories.
Build a Digital Repository
After the finished jewelry comes out, many factories will keep a sample for subsequent use, and SuperbMelt 3D scanner can quickly and accurately acquire 3D data of jewelry and store it, help large enterprises save sample room space and greatly reduce costs.
Easily Reproduce and Redesign
When a jewelry design is unique and difficult to redesign by hand, you can easily replicate jewelry like heirlooms, antiques, etc. with a scanner and improve or customize the original design.
Scan the Ring
The customer has high requirements for the three-dimensional data of the ring, and the traditional measurement method cannot accurately obtain the surface data. By scanning any ring with a Jewelry 3D scanner, the perfect shaded band can be made quickly and accurately.
Scan Custom Gems
Gemstones can be accurately scanned to ensure quality fit with bespoke bezels and mountings.
It can accurately restore the details of the diamond, such as size, structure, etc., and then perfectly design the size of the metal support of the diamond according to the digital model.
Jewelry Repair
Scan jewelry pieces and design their perfect fitting details for complex and difficult jewelry repair jobs.
The 3D canners are of great significance for the restoration of some cultural relics. In order to protect cultural relics, direct contact with cultural relics will be avoided. It can complete the virtual restoration of cultural relics with its fast, accurate and refined characteristics.
Necklace Bracelet Copy
Scanning chain links of necklaces or bracelets with a scanner can avoid the problem of improper chain links caused by traditional replication methods, and can ensure a perfect fit after assembly.
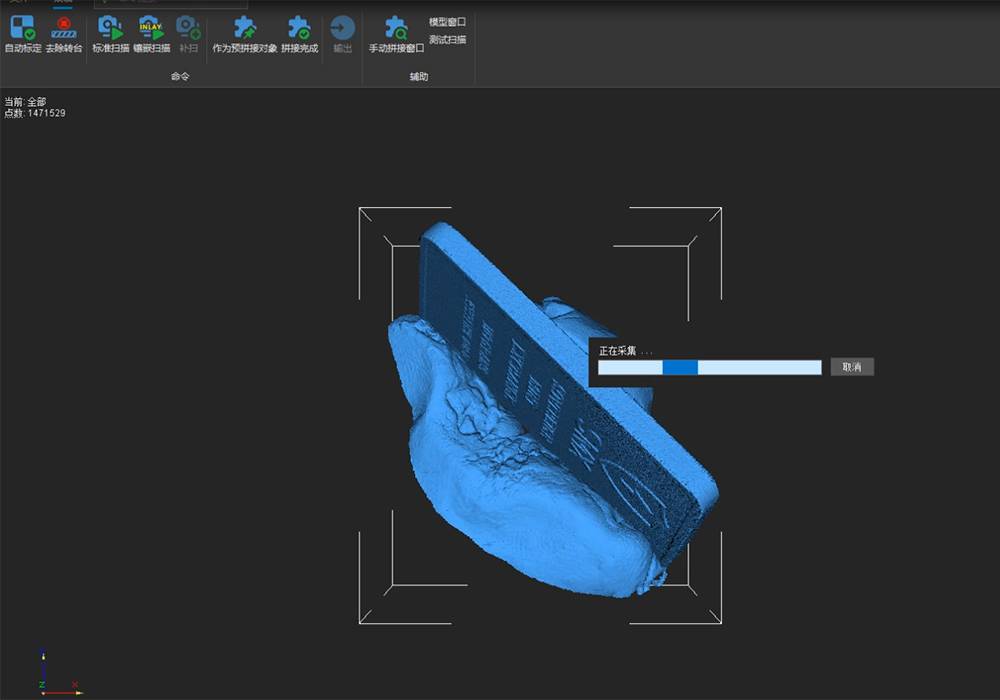
High Resolution: Intelligent fusion,single scanning precision can reach 0.01mm
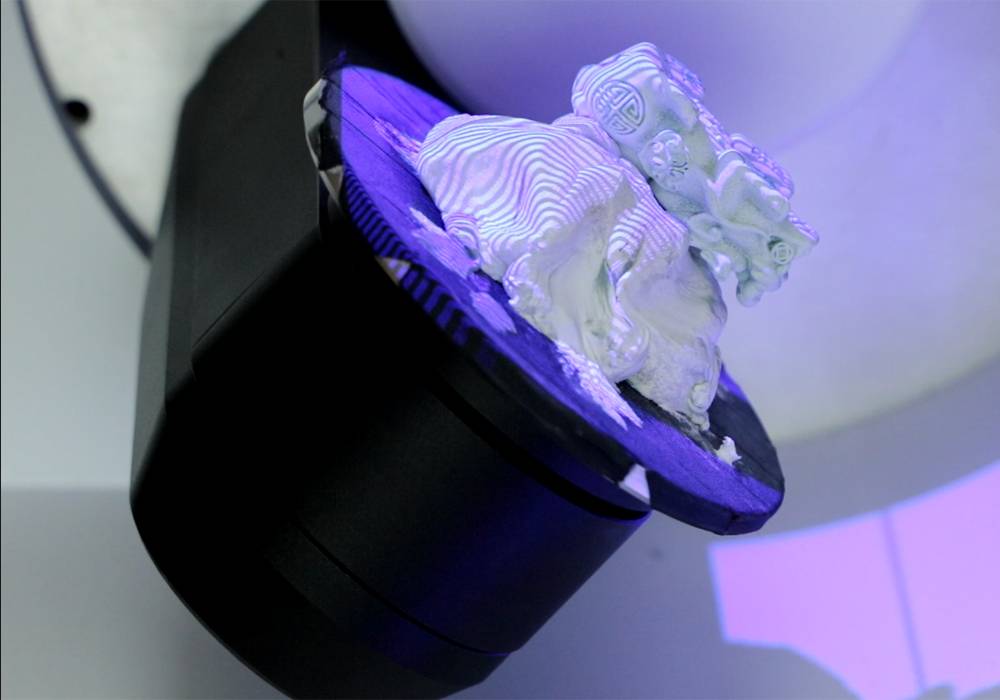
Fully Automatic Scanning 360 Angle: Swing arm+turntable dual-axis system for fully automatic dead-angle scanning
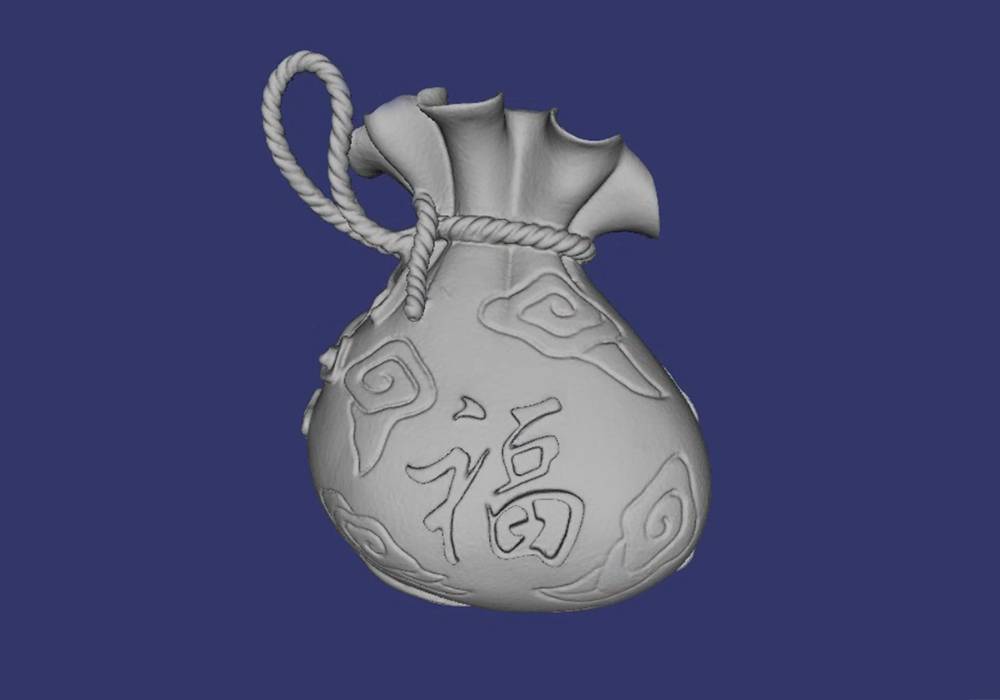
Fast Scanning: High frame rate data acquisition,0.3s high speed 3D reconstruction
Why SuperbMelt Jewelry 3D Scanner


Any Question About SuperbMelt Jewelry 3D Scanner
Guide of SuperbMelt Jewelry 3D Scanner
SuperbMelt Jewelry 3D Scanner Key Specifications
Scanning Accuracy
The accuracy of our scanners can achieve ≤ 0.01mm, and with the use of industrial-grade blue light, it can achieve high noise reduction, so that the output data can have high quality.
Camera Resolution
The scanner has a dual camera, the resolution of our scanner is 5 million, so it is two 5 million pixels, and the camera resolution affects the scanning resolution, so our scanner can present high accuracy and clarity at high pixels details.
Scanner Design
The size of the scanner is 331x317x456mm, the net weight is 15kg, the body design is small, easy to carry, and the position can be changed according to the workplace.
Power Configuration
Use AC100-220V, 50Hz power supply, which belongs to general power supply, and has no rigid requirements for the workplace. The machine interface is USB3.0/12V 5A, which is safe and convenient to use.
Scanning Speed
The speed of each scan of our scanner is less than 3 seconds. It should be noted here that the size and resolution of the scanned object may affect its speed.
Scanning Support
The file format is STL, which is compatible with most printers and design software on the market, and supports Win7/Win10 to meet the use of different computers; the capture range is 100×80×80mm each time, which is suitable for most jewelry sizes.
Machine Accessories
Magnetic multi-stage adjustable clamps make operation more convenient and flexible and intelligent linkage 2-axis turntable make the scan more accurate and never miss a single detail.
SuperbMelt Jewelry 3D Scanner Technology and Software
Technology:
- Global registration: global correction of mechanical deviation
- Multi-piece/Multi-group/Multi-angle supplementary scanning: support
- Feature /manual match: automatic feature / manual point selection matching
- Swing arm + turntable 2-axis system for fully automatic dead-angle free scanning
- Powerful and simple splicing function, support multiple group scanning, group features and selected points splicing (maximum scan 130 × 100 × 80mm or so, need to be spliced twice more)
- Excellent optical process, using 16mm 5MP standard optical measurement lens module, high precision intelligent fusion, single-frame scanning accuracy up to 0.01mm
- Unique Scanning Production Technology
SuperbMelt jewelry 3D scanners are more cost-effective than some suppliers using sls technology on the market. Because as the resolution increases, the cost of sls technology is also more expensive, but our scanners use professionally customized LED projectors, which do not limit the resolution. Therefore, our price is much cheaper, and our technology meets the quality requirements of industrial production, which is the most suitable for some jewelry studios, not only saves costs but also brings greater benefits.
- Fully Automated Scanning Technology
The machine is equipped with a 2-axis automatic high-speed rotating platform, which is specially designed for tiny jewelry workpieces, achieves high-speed rotation during scanning, and automatically memorizes the trajectory to complete fast and accurate scanning.
- Automatic Calibration System
The use of the automatic calibration system can achieve precision calibration, and at the same time, the precision calibration results will be quickly fed back, making the operation easier and more convenient.
- I.M.V. (Intelligent Multi View) Scanning Technology
The scanning capability of small and deep areas is realized by I.M.V scanning technology, and some small and complex jewelry can easily show super high scanning quality.
- Reverse Engineering (RE)
The machine is intelligently oriented by digitization, and designers can quickly control the design process and changes through parameters. Combining physical and surface design capabilities, it is possible to deal with incomplete scanned workpieces through forward and reverse integrated design.
- Automated Detection Analysis (CAV)
Using parametric automatic detection technology, problems such as product surface deformation and geometric error can be combined with CAD positioning system and feature analysis to quickly and real-time produce inspection reports and statistical analysis reports. This technology enables quality assurance units to quickly control the quality of jewelry workpieces.
- Test Record Keeping
All the operation records of the scanned workpiece will be recorded in detail, and the scanning time, whether the product is qualified and the reason, scanning conditions, etc. can be checked later. The storage function can facilitate subsequent viewing and research.
Software:
- Use the software that can realize reverse three-dimensional modeling design to reconstruct the three-dimensional CAD model of the real objects.
- Our scanners support most designs software such as ZBRUSH, RhinoGold, MatrixGold, Jewelery cad dream and more.
- After scanning, you can open any software to design or modify.
How Does SuperbMelt Jewelry 3D Scanning Work?
1. Preparation
Determine if a contrast enhancer is required. If the item to be scanned is transparent, black or metallic, you need to shake the contrast enhancer evenly and spray it on all surfaces of the item.
2. Scanning
- Turn on the power
- Place the object on the operating table after spring and open the scanning software
- Click the removed turnable button
- After setting successfully, click Mosaic scan
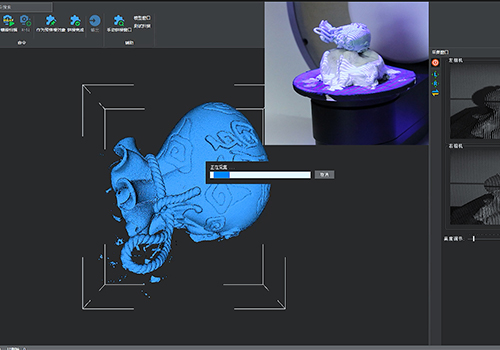
- The swing arm+ turnable 2-axis system can perform fully automatic scanning 360 angle, and the device will automatically stop after scanning
- Right-click the mouse to select the point and delete the redundant parts scanned
- Turn the object over and put it on the console after deleting, and operate in the same steps
3. Document Output
- After completing the front and back scanning, click Splicing
- After splicing, click output
- Select the appropriate parameters for output according to the degree of precision you need
- Check the effect
FAQ Guide of SuperbMelt Jewelry 3D Scanner
- 1. What Is The Software You Use?
- 2. What Is The Maximum Scanning Range Of This Device?
- 3. What Is The Maximum Load Capacity Of This Equipment?
- 4. Can I Customize The Colors And Company Logo?
- 5. Is This A Laser Scanner?
- 6. What’s The Contrast Enhancer Used For?
- 7. Is This Machine Suitable For Scanning Items With Small Holes/mesh Structure?
- 8. Do You Have One Machine For Dental And Another For Jewelry?
- 9. What Are The Design Software Compatible With This Scanner?
- 10. Would it Be Possible that I Send to You Samples, You Scan Them and Send Me Back the STL File?
- 11. Resolution/ Point distance(mm)
- 12. Scanning Volume(mm)
- 13. Is Possible to Define Different Arm Movements Than the Ones Are Predefined? (I mean, can I program different movements to optimize the scan on my product?)
- 14. The Video on Your Web Shows an Automatic Alignment of Two Scans by Clicking the Function “Splicing”. In Case the Software can Not Match Images, Does the Software Have the Function to Align the Different Scanners By the Typical Manual Three Point Selection on Each Image?
- 15. The Surface of Your Item is Too Smooth.
- 16. What is The Difference Between "Standard Scan" and "Inlay Scan"?
- 17. Are the Fluorescent Areas In the Document Not Scanned?
- 18. What Do You Use to Clean the Contrast Enhancer? Will it Have an Effect On The Jewelry?
- 19. Does it Affect Scanning if a Customer Changes Computers? For Example, Today He Uses a Desktop Computer and Tomorrow He Wants to Switch to a Laptop.
- 20. Plug Issues
- 21. Calibration Issues
- 22. I Think that We Are Not Seeing the Plains So Well on Your Scans Because Maybe There Is an Excess of Spray on Them, and We Are Watching the Dust.
- 23. Why Is the Scanned Result of 1.3 MP Lens Better than 6.3 MP Lens?
- 24. Can You Pass me the Model for You 6.3 MP Scan? So I Added to The Internal Report I am Making to Record your Scanner Performance and Distribute Internally and to my Network.
- 25. Is it Possible in This Model to Make and Add Just One Scan on a Specific Area of the Item Being Scanned (the other model was not possible)?
- 26. Your Scanner can Connect to Apple Computer?
- 27. Systems Supported by Tripod Scanners:win 7 64X/win 1040. What is the Difference Between Automatic Spherical Alignment and Automatic Feature Alignment, and What Are the Disadvantages and Advantages of Each?
1. What Is The Software You Use?
The software is developed by ourselves.Our software is free to upgrade for life, so you don’t have to worry about follow-up problems. Besides, we can change the software logo to your company’s if you need it.
2. What Is The Maximum Scanning Range Of This Device?
The maximum can scan 130 * 100 * 80 mm or so, need to be stitched together twice more. The object more than 100 mm will need to scan twice to stitch together.
3. What Is The Maximum Load Capacity Of This Equipment?
1kg. Our products are mainly for fine products and generally do not exceed this range.
4. Can I Customize The Colors And Company Logo?
Of course, but for custom colors, the minimum order quantity is 10 pieces.
5. Is This A Laser Scanner?
No, it is a structured light scanner, now there is no jewelry scanning with laser on the market.
6. What’s The Contrast Enhancer Used For?
If the item to be scanned is transparent, black or metallic, you need to shake the contrast enhancer evenly and spray it on all surfaces of the item.
And we will provide two bottles of it for free. But this contrast enhancer can only go by sea, not by air following the machine. So if the machine needs to be shipped by air, then you can only buy this product in your own region. And don’t worry, it’s easily available for purchase.
7. Is This Machine Suitable For Scanning Items With Small Holes/mesh Structure?
No, it’s difficult to scan complete.
8. Do You Have One Machine For Dental And Another For Jewelry?
No, this machine can scan both. Because the accuracy of our machine meets the requirements.Generally speaking,the equipment dedicated to scanning jewelry, it has a higher accuracy than dental molds.
9. What Are The Design Software Compatible With This Scanner?
Most of the mainstream software on the Internet are compatible, such as ZBrush, 3Shape, Blender, MatrixGold, SolidWorks, Meshlab,3ds Max, Maya.
10. Would it Be Possible that I Send to You Samples, You Scan Them and Send Me Back the STL File?
You could send the samples to us, and we are willing to scan them for you. And then you can take it as a reference to check if our machine is what you are looking for.
11. Resolution/ Point distance(mm)
The point distance is based on the mesh density,the greater the mesh density, the smaller the point distance; meanwhile, the finer the image, the larger the file. Mesh density, we usually setbetween 8-11, the most are with 10. And there is an important thing needing to note that when the mesh density is above 11, the details of image will not be greatly improved, and the points noise around the object scanned with mesh density of 11 more than that of 10. So not the greater the mesh density the better the detail.
12. Scanning Volume(mm)
About 70mm, if your object is relatively high, it can be placed horizontally when scanning.
13. Is Possible to Define Different Arm Movements Than the Ones Are Predefined? (I mean, can I program different movements to optimize the scan on my product?)
Our machine does not support customized programming. But this scanner has two scanning paths, one is standard scan, the other inlay scan. When you run the inlay scan, the arm is swung a little more times,and the scanned image is more detailed. Besides, our scanning is 360 degrees without dead angle, and if the scan is not complete,you could also run the patch scan. Our scanner will allow you to scan the details you want.
14. The Video on Your Web Shows an Automatic Alignment of Two Scans by Clicking the Function “Splicing”. In Case the Software can Not Match Images, Does the Software Have the Function to Align the Different Scanners By the Typical Manual Three Point Selection on Each Image?
Our scanner supports feature matching and manual matching. If two images cannot be stitched together automatically, we can manually select points for splicing.
15. The Surface of Your Item is Too Smooth.
For the smooth of surface, it can be set by our programme. Adjust the “Smoothness” and “Point noise”. The larger the value,
the smoother the surface of the object, and some details of the surface of the object will be lost.
16. What is The Difference Between "Standard Scan" and "Inlay Scan"?
Inlay scan will scan more carefully, the details present more comprehensively, the scanning time is also more 20-30 seconds.
17. Are the Fluorescent Areas In the Document Not Scanned?
Or is the contrast enhancer not sprayed, so it is missing.The light inside the hole is not able to enter, the inside can not sweep, so it leads to the appearance of fluorescence.
18. What Do You Use to Clean the Contrast Enhancer? Will it Have an Effect On The Jewelry?
Ultrasonic or water wash. There are contrast enhancers that fall off more easily and can be washed off by water rinsing. In addition, alcohol is easier to clean and has no effect on metals or diamonds.
19. Does it Affect Scanning if a Customer Changes Computers? For Example, Today He Uses a Desktop Computer and Tomorrow He Wants to Switch to a Laptop.
No effect, just connect with the dongle.
20. Plug Issues
Different countries use different plugs, need to confirm with the customer before placing an order.
21. Calibration Issues
(1) Time: 1 minute at most.
(2) Period: About 15-20 days to calibrate once.
(3) The calibration plate should be placed well, if it is scratched, the calibration will be wrong.
22. I Think that We Are Not Seeing the Plains So Well on Your Scans Because Maybe There Is an Excess of Spray on Them, and We Are Watching the Dust.
Because we set the value of “noise point” too low, the surface will be very rough and a lot of stray spots will appear. It can be adjusted.
23. Why Is the Scanned Result of 1.3 MP Lens Better than 6.3 MP Lens?
As we all know, the higher the pixel, the more accurate and clearer the image should be. We are experts in this field and have come across many similar questions. I can tell you quite frankly that the reason is that they have a small scanning range, so the accuracy becomes higher.
heir range is 80x60mm, no depth range is shown, but actually the scanning
range is only 60x50mm, which our technician has tested. And our scan range is 100x80x80mm, which is bigger than theirs, and there is no reduced range scan, if our machine reduces the scan range, it will present better results than theirs.
At the same pixel, if the scan range is reduced to four times the original, its accuracy will increase nearly four times with it. I will send you a scan file with a range of 75x56x50mm later so you can confirm it. I can guarantee that with the same equipment, our scans will be much better than the last one and than theirs.
24. Can You Pass me the Model for You 6.3 MP Scan? So I Added to The Internal Report I am Making to Record your Scanner Performance and Distribute Internally and To my Network.
Our scanning software is programmed and produced by ourselves, only our machine can be used, it is not applicable to other machines. So it may not provide much reference value for you.
25. Is it Possible in This Model to Make and Add Just One Scan on a Specific Area of the Item Being Scanned (the other model was not possible)?
Our machines have a Patch Scanning function. If you are not satisfied with some part of the scan results or want to enhance the details, you can select that area to make up the scan.
27. Systems Supported by Tripod Scanners:Win 7 64X/Win 1040. What Is the Difference Between Automatic Spherical Alignment and Automatic Feature Alignment, and What Are the Disadvantages and Advantages of Each?
Automatic spherical centre patching requires the manual application of marker points and the positioning of the spherical centre with the marker points. The disadvantages are that you need to apply the marker points manually, whereas the advantages are that the patching is accurate and there is no requirement for the shape of the object.
Feature matching is based on the features of the surface of the object. The advantage is that you do not have to apply marker points, but the disadvantage is that symmetrical or non-featured surfaces may not be stitched properly.

 © Copyright 2008-2021 Superb Electromachinery Co., Limited